A Simple Dayshade
by Mayken van der Alst
Trimaris is indeed a sun-kissed kingdom but sometimes you just want to sit in the shade. Here are instructions on how to create a simple day shade for use at SCA events that is inexpensive to make, is versatile in how you can use it, and will pack up fairly small so that it will fit most standard cars - all of that without breaking your bank!
Please note: This dayshade will not protect you against rain. In order to achieve that you will have to invest in (more expensive) canvas or cotton duck cloth.
This dayshade can be set up two ways: with four (4) poles and a sloped back or with six (6) poles as a shade roof.
You will need:
⦁ One 9x12 Canvas Dropcloth from your preferred hardware store. Harbor Freight sells these for $16.99 and 20% off coupons are easy to find.
⦁ Heavy cotton or linen thread and a long, strong needle - for sewing your hand-sewn grommets
⦁ Four/Six 8ft 2x2 wood poles ($1.65/each at Lowes)
⦁ Three/Four 8ft 1x2 wood furring strip ($0.98 at Lowes)
⦁ Four/Six 4″ long threaded bolts (to go into the end of your poles; alternatively you can use a wooden dowel cut to size)
⦁ Ten (10) stakes
⦁ Rope
⦁ (Optional) Finials for the tops of the poles and paint/stain for the poles/canvas
Take your canvas drop cloth and mark the positions for the grommet holes - 12 inches from the end as well as on the midway point on either side.
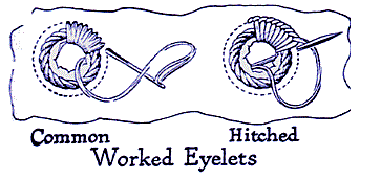
'Fortify' these areas with canvas or leather patches since a lot of stress will rest on those, then insert your grommets. Handsewn grommets will last longer without repair than metal grommets and are easy to do. A simple blanket stitch with heavy-duty yarn will do the trick!
Cut your 2x2 poles to length - you will need two poles that are 7ft tall and two/four poles that are 6'4" tall. You will need to dril a hole into one end of each pole to insert a dowl/metal pin.
Take two of your 1x2 poles and drill a hole into each end (flat side). The hole has to be big enough to slide over your dowls/pins. These poles serve as ridge poles adding additional stability; in a pinch you can set up your sunshade without them but that will require more tweaking during set-up to get things straight and tight.
Cut the remaining 1x2 pole into 4" pieces, then drill two holes into them. These are your tension sliders allowing you to tighten your ropes without having to move stakes.
You can now stain or paint your tent poles, and you can even paint your canvas! The best paint to use to paint your tent/;dayshade is exterior latex paint (thinned with water 1:1). It will remain flexible and not crumble off of your fabric and it won't be expensive.


Dayshade - Set up with 6 poles and 1 ridge
Dayshade - Set up with 4 poles